

Features:
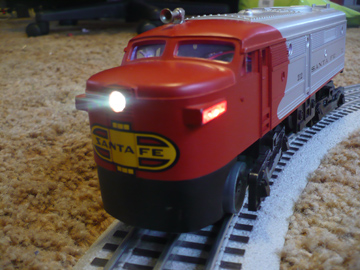
Installation pictures are of a modern Lionel Santa Fe Alco. Adapt the instructions to fit your Alco locomotive.
 STEP 1A
 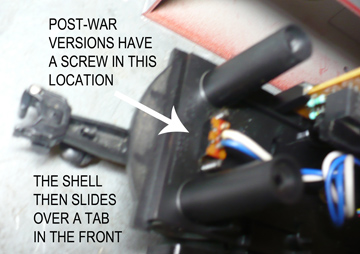 STEP 1B
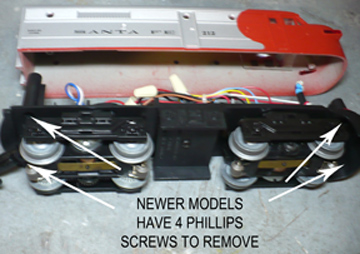
1. Start by removing the shell of your locomotive. If your locomotive is modern, there are four screws located just above the trucks as seen in picture 1A. If you have a postwar model, there will be a screw in the general area of the rear of the loco shell as seen in picture 1B. You must then slide the shell off of a tab at the front of the loco.
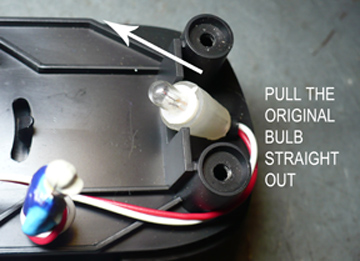
2. Remove the original bulb from the locomotive. Simply pull the bulb straight out by the plastic base. Do not discard the base, we will use that to simply wire the new circuit.
3. Now it's time to place the new LED circuit board into the locomotive shell. Carefully align the three LEDs into proper position. You want each LED to be near the lenses; it doesn't have to be perfect. You can slightly move each LED with just a bit of force but don't overdo it. Once you like the position, remove the green paper backing from the foam adhesive and press into place. Try not to touch the adhesive, it will reduce the sticking ability. Press into place and hold for about 10 seconds. Some shimming may be necessary for proper fit.
4A. Time to wire the board. If you have a modern locomotive like in the picture, there's a simple process to wire the board without any modifications. Take the original bulb and remove it from the plastic base by bending the wires out straight(1.) and then pull the bulb out(2.)
4B. Take the pigtail wire from the LED circuit board and feed the two wires into the two holes on the plastic holder(1.), then bend the wires back up the sides of the holder(2.)
5. With the holder in place on the pigtail, press the holder back into the light socket on the locomotive. Press firmly until it seats completely.
6. Place the shell gently back onto the locomotive's frame. Before re-inserting the screws, place it on the track and apply power. The lights should illuminate vibrantly! If not, check that your connections are solid and that a wire didn't come loose somewhere.
7. Once everything is working properly, re-insert the screws and ENJOY!
Where do you want to go next?
Return to Product Selection Page
 STEP 2
NOTE: Some models may have a bayonet base bulb. In this case, push the bulb inwards and twist to left to remove the bulb.
 STEP 3
 STEP 4A
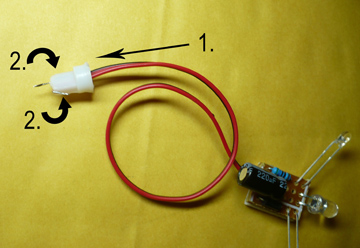 STEP 4B
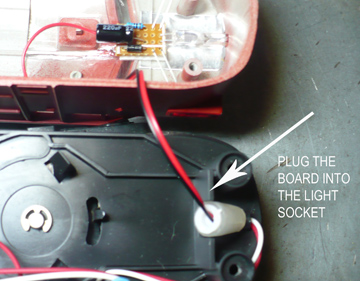 STEP 5
NOTE: If you have a postwar locomotive with a bayonet bulb, you must either connect the bulb socket wires to the pigtails or locate a power source you can hook the LED board up to.
 STEP 6
NOTE: If you are using DC, and the lights do not work, remove the plastic holder from the socket, turn it 180 degrees and re-insert it into the socket and try again. LEDs require correct polarity to illuminate using DC.
Visit my eBay Store!!