
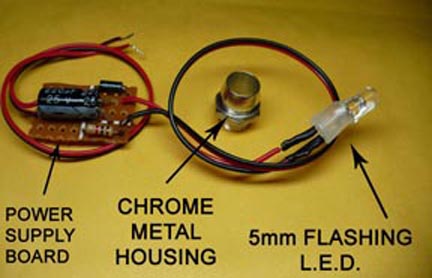
Item Specs
1. Start by removing the shell from your locomotive. Follow the instructions included with the product. In my case, I simply popped the single tab off on each side of the 'Beep' to remove the shell.
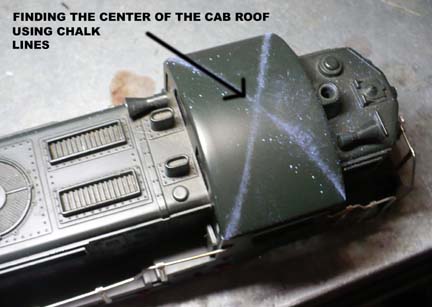
2. Find your desired location to install the flashing LED. I chose the center of the cab roof and used chalk lines to establish the exact center.
3. This is a two part process. (1) Using a 5/16" drill bit, drill a hole completely through the location. Remove the nut and washer from the chrome housing and insert the housing, threads first, into the hole. (2) From the inside of the shell, place the lock washer over the threads and then screw the nut over the threads. Hand tightened only; Using a wrench may warp or crack the plastic shell. Proceed with care! This is an irreversible process!
4. Take the LED w/ the white plastic retaining socket and press it firmly, from the inside of the shell, into the chrome housing. IF the LED does not have the white plastic socket already under it, you need to write me a nasty message asking why I forgot to put in on there! Press the LED and retaining socket in as far as you can. The LED should protrude slightly above the top of the chrome housing on the outside of the shell. Now is also a good time to remove the green paper from the adhesive on the back of the power supply board and press it into place inside the shell. Keep in mind, you need at least an inch clearance for the board once the shell is reattached to the locomotive.
5. Now you need to connect the wires to a power source in your locomotive. This would be the wires that come into the shell from the trucks (wheels). Connect one wire from the power supply board to one of the incoming power wires from the wheels. Repeat for the second wire. If you're using AC power, it does not matter which wire connects to which. The power supply board will convert the AC to DC either way. For my Beep loco, I chose to connect to the motor lugs. This way, the LED will only flash when the locomotive is moving.
6. And now for the moment of truth! Place the locomotive on your track and keep the shell loose. Apply power to the locomotive; the LED should begin to flash in about 1 sec. and continue flashing. If successful, re-attach the roof shell and enjoy! If the LED will not flash, check for a loose connection and be sure you have applied at least 8 volts AC. The LED flashing unit can be checked for proper function using a 9v battery.
Back to Product Selection Page
 STEP 2
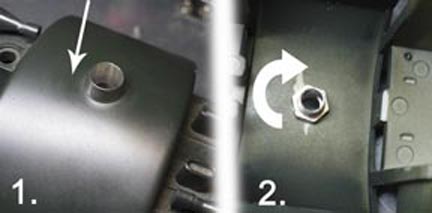 STEP 3
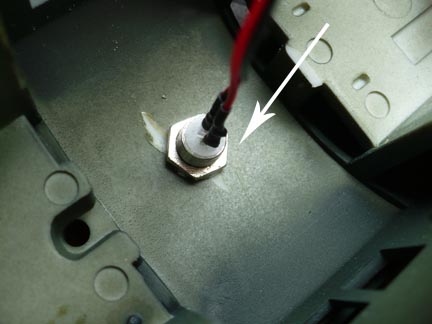 STEP 4
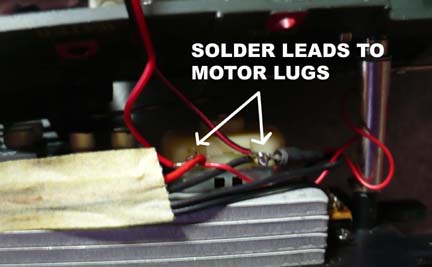 STEP 5
 STEP 6
Where do you want to go next?
Visit my eBay Store!