
AND Dual Green Marker Light Kit
Features:
****Whether you have purchased the Dual Red LED kit OR the Dual Green LED kit, the installation is exactly the same for either kit.
 STEP 1
1. Start by removing the roof of your train car. Most cars require removal of a couple screws on the underside. Consult the instructions that came with your car for proper removal.
2. Locate ideal spots for the tail lights to be placed. Measure and mark the spots with a dot; or dimple the spot with a drill bit tip.
3. Careflly drill a 3/16" hole at each mark. Proceed with caution; this is an irreversible process!
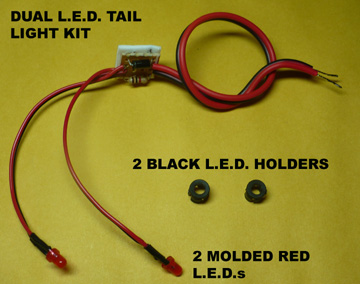
4. Next, locate the black LED holders. They are usually shipped attached to the LEDs. Simply dislodge them with a slight pull. Insert a black LED holder into each hole. Be sure to push them all the way in. It will be a snug fit. The holders keep the LED in place and also clean up the drilled holes by producing a nice looking trimmed housing.
5. From inside the car, insert a red LED into each holder. Compress the holder and LED together being sure not to break off any leads of the LEDs. The tip of the LED will be slightly depressed inside the housing. Once you have the LEDs inserted, locate an ideal spot on the car floor to place the power board. Remove the green paper backing from the foam adhesive and stick the board to the floor. Try not to touch the adhesive, it will reduce the sticking ability.
6. Now it's time to wire the LEDs. Locate the incoming wiring from the trucks of the train car. Usually you'll see two wire nuts as in my Lionel car pictured. Some MTH cars have two metal lugs on the car floor. Simply connect the red and black wires from the board to the incoming power wires. It does not matter which wire goes to which if you are running AC. The electronics on the power board will correct the polarity automatically. If you use DC to power the train, correct polarity is required and you may need to reverse the wires
7. Place the train car on the track and apply power. The tail lights should illuminate along with the car's interior lighting. If not, check for loose connections or possible short circuits.
8. If everything works as it should, re-attach the roof and enjoy!
Back to Product Selection Page
 STEP 2
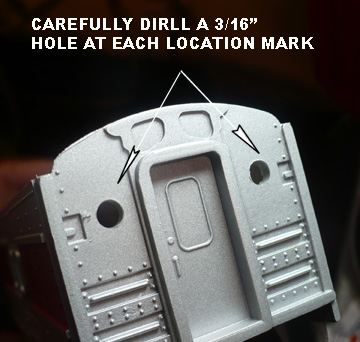 STEP 3
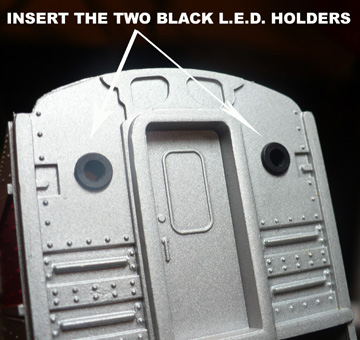 STEP 4
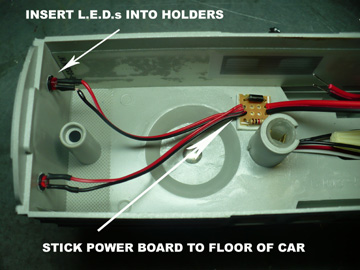 STEP 5
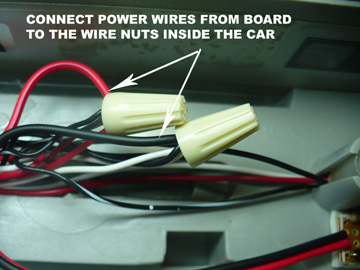 STEP 6
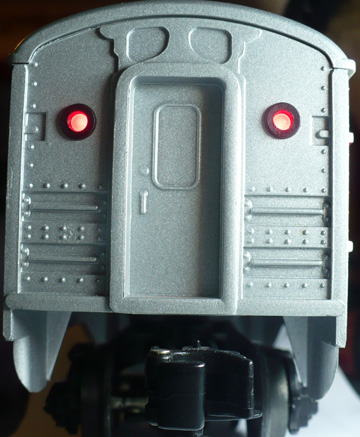 STEP 8
Where do you want to go next?